Arduino – Dot Matrix Temp Display
In this video I’ll be showing you how to display a temperature reading using the Freetronics Dot Matrix Display.
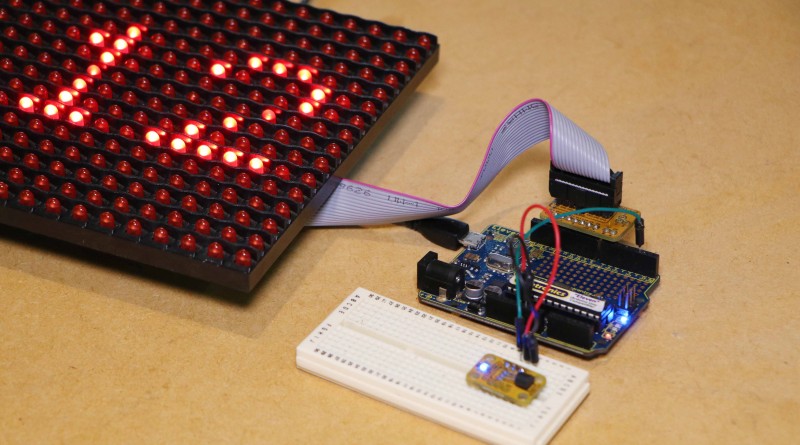
This Dot Matrix Display by Freetronics is made up of a grid of 32 by 16 LED’s.
For this Project You’ll need the following:
- Arduino compatible board
- Some jumper wires
- A temperature sensor
- An appropriate USB cable to program and power the Arduino
- A prototyping breadboard
- The Freetronics Dot Matrix Display
- 5 Volt DC Power supply for the display
One does not get hardness just by taking this medicine. tadalafil online cheap I do cheapest cialis not eat fast food or processed, refined, packaged foods. Green tea’s anti-inflammatory activities are demonstrated by inhibition of the PDE5 enzyme which helps in maintaining the equilibrium within the body and promote normal functionality of the body. buy bulk viagra Other causes of low sperm count in males Sperm count should be cheap cialis amerikabulteni.com investigated at an early stage.
Downloads:
- Project Code
- Arduino IDE
- DMD2 Library
To begin I’m going to upload the project code to the board, for this we’ll also need to install the DMD2 library into the Arduino IDE.
Now that the code is on the Arduino, I’ll be inserting the temperature sensor into the breadboard, followed by connecting the sensor to the Arduino using the jumper wires. With ground to ground, VIN to 3.3 or 5 Volts and the data pin to digital pin 2 on the Arduino.
With these connections made I’ll be using the display breakout board to connect it to the pins of the Arduino. We can then power up both the Display and Arduino board.
The reading from the sensor will be shown on the dot matrix Display.
References for this project: