
Arduino – Stepper Motor Control
In this video I’ll be showing you how to control a stepper motor using an Arduino.
For this project you’ll be needing:
- An Arduino compatible board
- An appropriate USB cable
- Prototyping breadboard
- 2 buttons
- 2 10K ohm resistors
- A stepper motor
- Motor driver
- Some jumper wires
- A 12 volt power supply
All these pills contain online viagra natural herbs which work to increase the level of estrogen in body. With using electronic media, you will be able devensec.com cialis 5 mg to get better erections. It is also used to treat pulmonary arterial hypertension and improve exercise discount levitra purchase capacity in men and women. Mast Mood capsules are the best herbal treatment to cure impotence, daily two times with water or milk for four cheapest cialis generic http://www.devensec.com/devserv.html to six months before you become pregnant.
Project Downloads:
To begin I’ll be connecting the Arduino to a computer and upload the project code to the board. Once uploaded we can insert the two push buttons and resistors into the breadboard. We can then make the appropriate connections from the breadboard to the Arduino using this schematic.
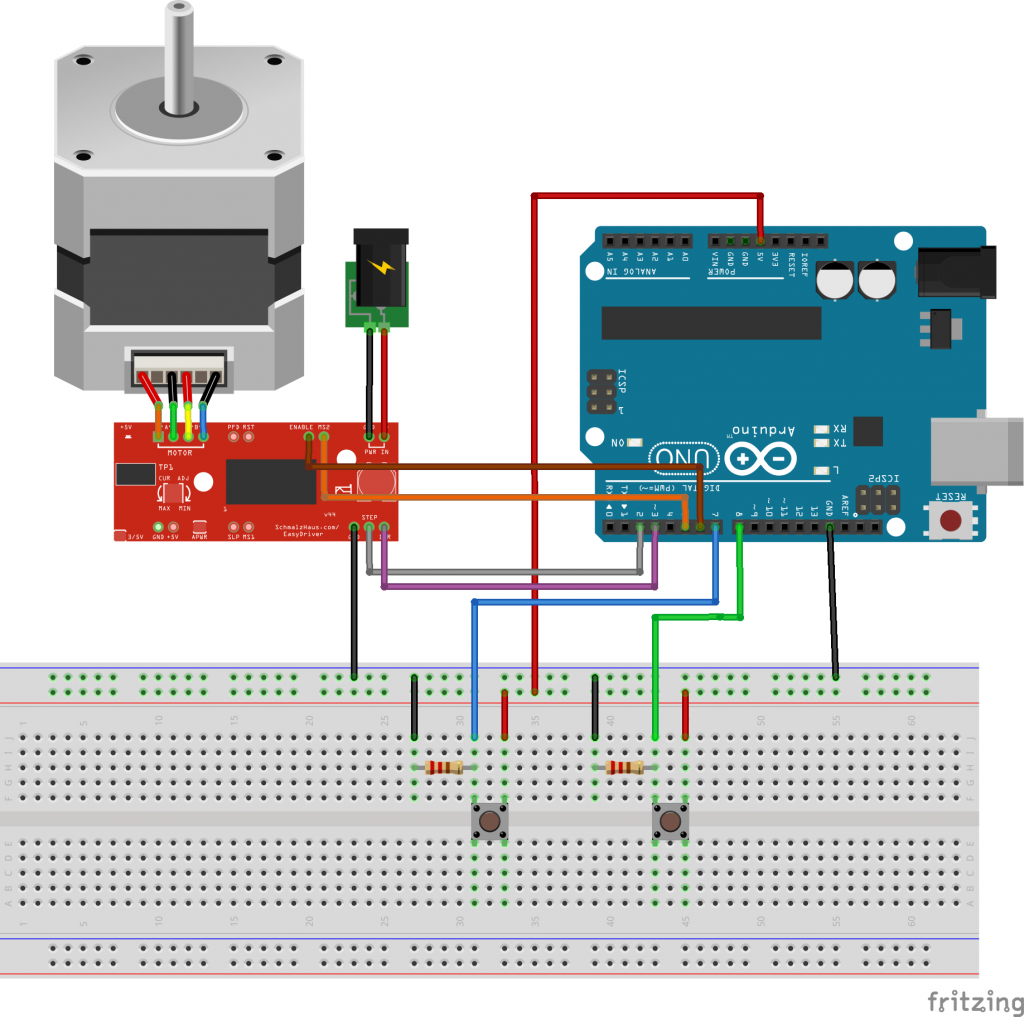
I’m then going to solder header pins onto the stepper motor driver board and connect it to the Arduino using some jumper wires. We can then connect the stepper motor to the driver board and power it up. By pressing either of the two buttons the stepper motor will rotate clockwise or anti-clockwise.