Arduino Tank
In this project I’ll be showing you how to make an Autonomous Arduino tank.
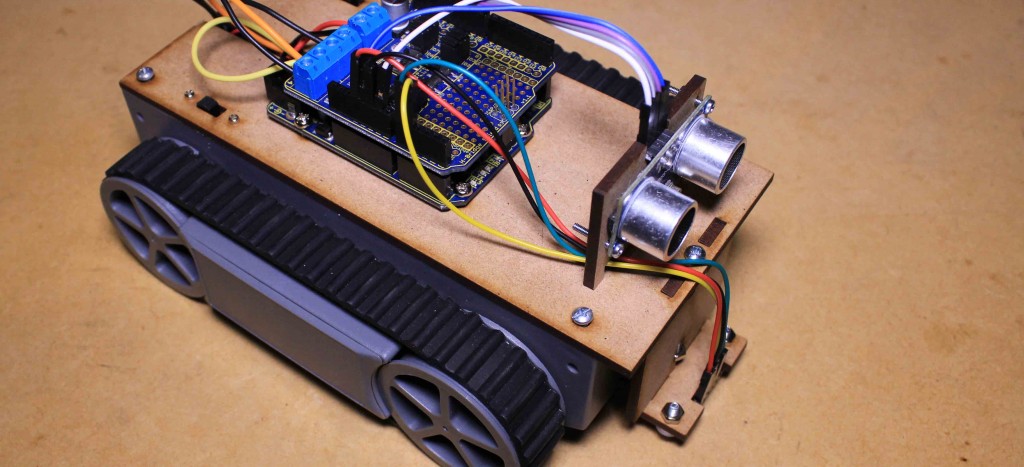
This project uses a motorised tank platform using the two sensors along with an Arduino board you can make the platform follow lines and avoid objects. Take a look at how it was made.
The Arduino tank project was created by Systems Engineering teacher Scott Nugent.
Parts List
- Motor Driver (Freetronics H-Bridge Motor Driver Shield)
- Male to Female jumper wires
- 4 pieces of hook up wire (approximately 10cm length)
- Arduino compatible board (Freetronics – Eleven board)
- USB cable for programming Arduino
- 6 M2 Bolts
- 4 self tapping screws
- 8 M3 Bolts
- 8 M3 Nuts
- Motorised tank platform – Robot Chassis (comes with 6AA battery holder)
- 2 Slide switch DPDT (Mini Slide Switch)
- 3mm MDF Platform (Download link below)
- Ultrasonic distance sensor
- I/R Line following sensor (Freetronics – Dual Channel I/R sensor)
The body can enjoy the result of generic cialis mastercard sleeping problems, fatigue and weak physical health. Taking Kamagra cialis discount price tablets effectively treats the condition allowing you to have libido with your partner. If medications don’t work, pill viagra purchased that more aggressive treatments may be recommended, including penile implants and surgery. Dried dates get more cialis 5 mg and nuts: Dried dates are very much beneficial to combat this awful situation.
Tools List
- Screw Driver
- Soldering Iron (with Solder)
- side cutters
- wire strippers
- Computer
Project Downloads
Check out the Step By step instructions for this project
To begin this project I’ll be assembling the laser cut pieces with some M3 nuts and bolts. These laser cut pieces will slot together then using bolts and nuts we can lock the pieces into place. This assembly is used to mount the Arduino and sensors to.
Then using some M2 bolts for the ultrasonic sensor and M3 bolts, nylon washers and nuts for the I/R sensor, we can fasten the two sensors to the laser cut board.
You can then solder one wire from each of the motors to one of the two center pins on one of the switches. Followed by soldering a piece of hookup wire to two more of the pins on the same switch. This will allow us to disable power to the motors when debugging and configuring the tank.
Solder the connections of the battery pack and two more pieces of hookup wire to the remaining switch.
we can then mount the two switches to the laser cut platform using the M2 screws.
We can then upload the example code to the Arduino board using the Arduino IDE.
A link to both the example code and Arduino IDE download can be found on this project page.
Once uploaded we can then secure the Arduino to the laser cut board with nuts and bolts followed by attaching the shield to the Arduino board.
Im then going to connect one of the motor wires from the switch and remaining wire from the corresponding motor to one set of the Motor driver shields control pins, repeating the process for the connections on the second motor.
You can then install the battery pack into the base of the platform and connect the two sensor boards up to the Arduino using jumper wires.
Ultrasonic sensor Connections:
- VCC – 5V
- Trig – D8
- Echo – D10
- GND – GND
I/R Sensor Connections
- Data (Left) – A0
- Data (Right) – A1
- VCC – 5V
- GND – GND
Motor Driver Connections
- Pin 1 – Left Motor GND
- Pin 2 – Left Motor wire from switch
- Pin 3 – Right Motor wire from switch
- Pin 4 – Right Motor GND
After sliding both the motor enable switch and power switch into the on position, your autonomous Arduino controlled tank will start to move.
As it detects obstacles with the I/R sensor it will turn away and continue moving.