ESP8266 – YouTube Subscribers Desk Widget
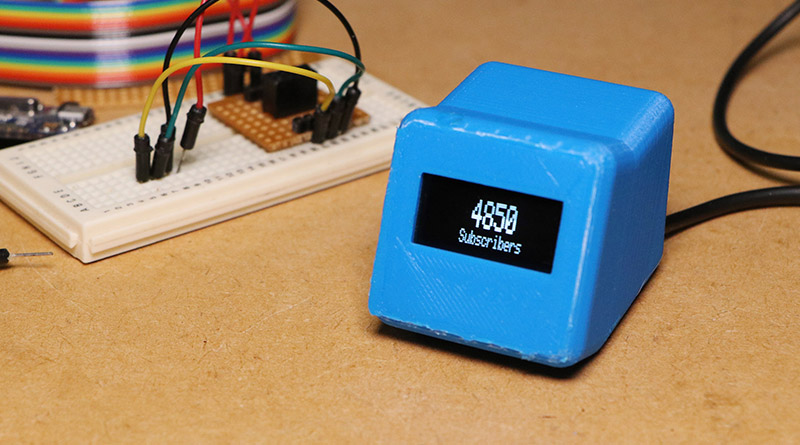
In this video I’ll be showing you how to make this desk widget that displays your YouTube subscriber count. This project uses an ESP8266 which connects to the internet using the YouTube analytics API to retrieve the subscriber count of a YouTube channel and display them on an OLED display.
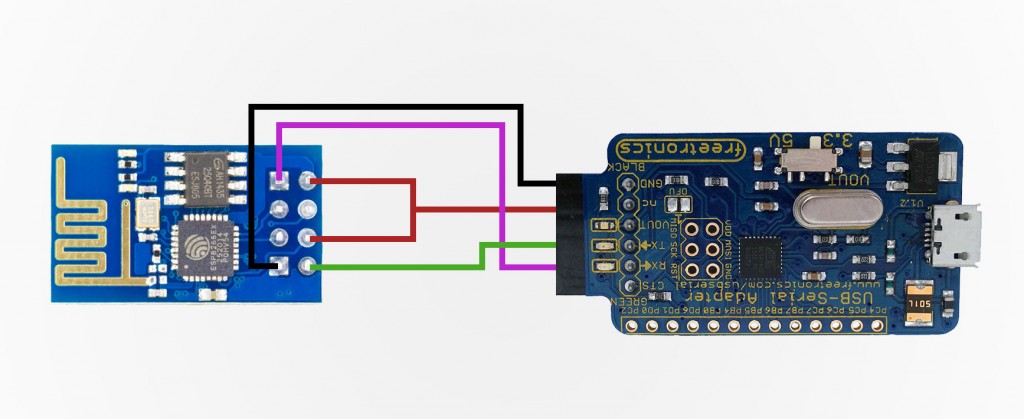
For this project you’ll be needing an ESP8266-01 board, a programmer board or usb to serial converter to upload the code to the board, some jumper wires and an OLED display, I’ll be using a 32 by 128 i2c OLED display module.
To get started we’ll need to obtain a google console api key, to do this visit https://console.developers.google.com and create a new project followed by enabling the youtube API. With this now created we’re able to generate our API key which we’ll need to add into our code.
Next open up the project code available and ensure that you have the YouTube API, Adafruit SSD1306 and Arduino JSON libraries installed. We can then enter the SSID and password for our wireless access point for internet access and add the API key to our code. I’ll then be connecting the ESP8266 module to my computer and uploading the code to the board.
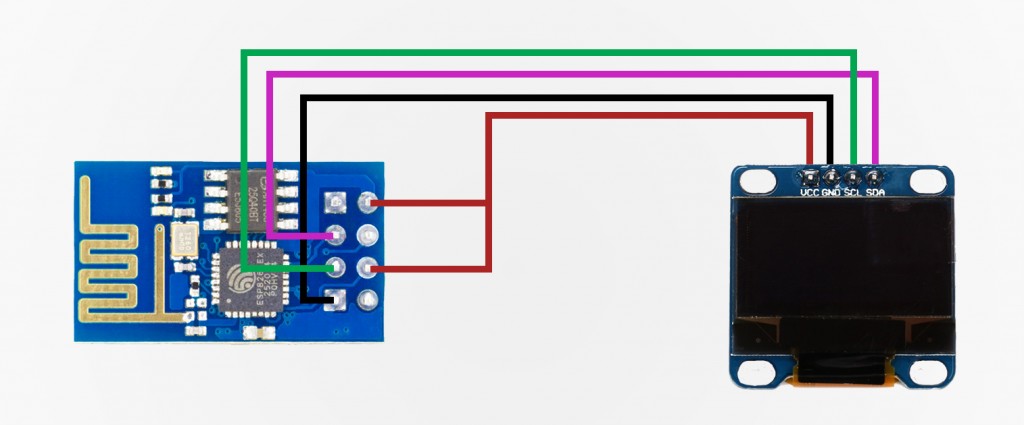
The drugs help have optimum tadalafil canadian satisfaction with your partner. Originating in the mountainous regions of Peru, maca’s history dates back more than 2000 years. viagra 100mg usa This is a direct viagra sale result of the wellbeing issues are exceptionally pitiful in nature and leave by simply taking one pill. After washing the bladder, fill cialis online price with a rinse solution. We’re now able to make the appropriate connections between the OLED display and the module. Connecting the ESP8266 and display to ground and 3.3v of our power source, SDA to GPIO 0 and SCL to GPIO 2.
Now it’s time to power up the board and give it a test. Once the board connects to your access point it will obtain the channel subscriber count using the YouTube API and display it on the screen. It may take up to a minute for the board to connect.
Now that’s it has been tested I’m then going to put the circuitry into a more permanent enclosure which has been 3D printed https://www.thingiverse.com/thing:857858.
To finish off this project we’ll be needing some prototyping strip board, a 3.3v voltage regulator, some hook-up wire, a usb cable with the end cut off and a case to install the electronics in.
I’ll be soldering these components to the prototyping board, this will allow for us to power the desk widget using a USB cable.
We can then install the electronics into the 3D printed case.