Arduino 433Mhz Communication
In this video I’ll be showing you how to get started with these Arduino compatible 433Mhz modules. For this project you’ll be needing:
- Arduino compatible 433Mhz transmit and receive modules
- 2 Arduino compatible boards
- Some jumper wires
- An LED
- 220 ohm resistor
- Momentary push button
- USB cables
- Prototyping breadboard
Before we can assemble the circuit I’ll be uploading the transmit and receive code to the Arduino boards. We’ll need to install the Radio Head library into our Arduino IDE which is referenced in our code.
Project Downloads
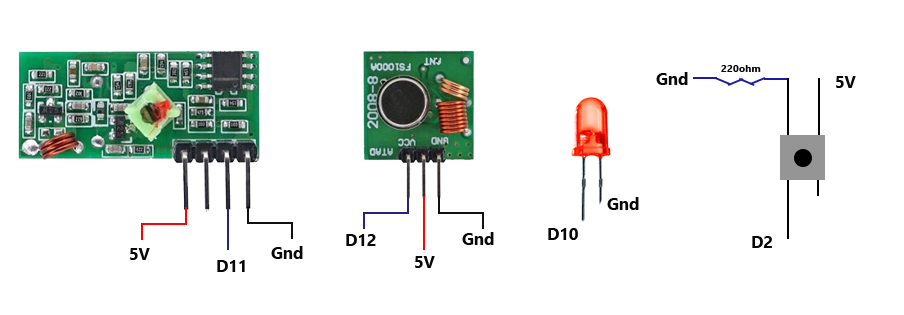
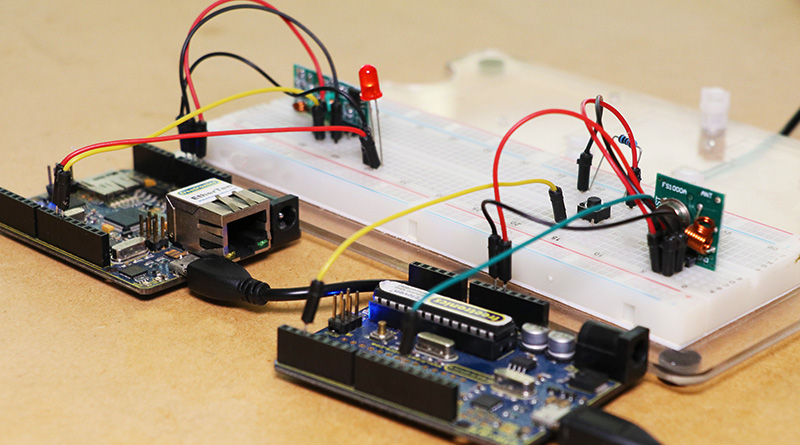
To begin I’ll be connecting the transmitter module to the Arduino board using digital pin 12, 5V and gnd, followed by connecting the button and resistor up which we’ll be using to control the LED remotely with. The button will need to be connected to 5V, gnd and digital pin 2
We can then assemble the receiver circuit by inserting the module into the breadboard along with connecting the positive leg of the LED to digital pin 10 and the negative side to ground.
To test out the modules, first power them up using the USB cables and press the momentary push button connected to the Arduino with the transmit module. Once pressed the LED will change states to on or off.