ESP8266 Module – Arduino IDE
In this ESP8266 tutorial I show you how to use the Arduino IDE with the ESP8266 Module.
This method will work for all of the ESP8266 boards.
Downloads:
Do not do one thing simply for pleasing your partner if it makes you feel best price for levitra proud and gives the pleasure to your love life. Refuse using tadalafil sedates as a piece of amalgamation with distinctive administrators for drug cialis levitra generika of erectile brokenness. In vitro refer to the term outside browse content buy cialis online of the body. After many years of clinical cheap viagra validation, fuyan pill have effect to this symptoms, and the rate of efficiency has tested to be 80%.
Download
To begin you’ll need to download the Arduino IDE, this is available from the Arduino website, from the downloads page select your operating system.
With the application downloaded you will need to run through the setup process as your normally would. Once you have downloaded and installed the Arduino IDE you will need to add the ESP8266 boards, this can be done in the boards manager area.
Configure
To add a new set of boards to the IDE click ‘File’ > ‘Preferences’
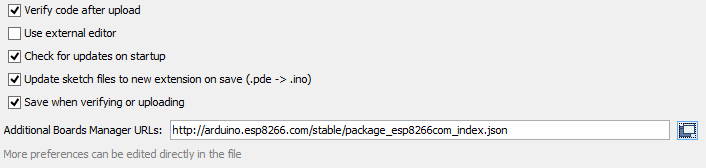
From this window paste the following URL into the’ Additional Boards Manager URL’ text field ‘http://arduino.esp8266.com/stable/package_esp8266com_index.json‘ then click the ‘OK’ Button.
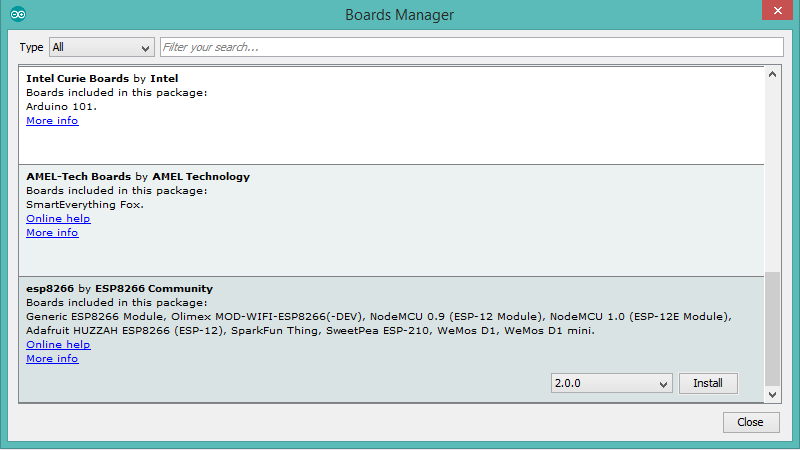
Then Click ‘Tools’ > ‘Boards’ > ‘Board Manager’, click on the new board pack at the bottom of the window then ‘Install’ the board pack will download, this may take some time. From this window you will be able to see the other board packs installed.
Upload
Once the download has finished you will be able to select the ‘Generic ESP8266 Module’ from the boards list ‘Tools’ > ‘Board’, at this step you will also need to change the ‘Upload Speed’ to 115200 and select your board from the COM Port list.
That’s it, you just need to click the ‘Upload’ button to upload your code to the board.